Amateur Photography - ISO Settings
What Is It and How Does It Determine The Quality Of A Picture

30 Second/ISO-200 Night-Time Exposure Shot Without Flash
Most people who
take quick pictures usually set there cameras to automatic mode. In this
mode, the camera determines brightness of the image is by the light
that is exposed onto the lens with the shutter speed used. With a indoor
picture or a cloudy day, because there often times no direct sunlight,
and only ambient light to work with, the camera will make a image
brighter by adding color grains to enhance the brightness of the image.
The main trade-off though is that because there isn't direct sunlight,
the camera has to take a picture at a slower shutter speed, unless flash
is used to compensate for the lack of direct light. Also, because more
color grains are used to enhance the brightness of a image, the picture
becomes gainer and distorted in the process. In laymen terms, the ISO
setting determines the number of grains used in the image, along with
the shutter speed of the camera.
There are situations were a high ISO setting would be of good use. With nighttime photography, the number of color grains in correlation with the shutter speed means that one can take pictures at night, if there is a light source provided, like street lights, or the camera flash. However, as mentioned earlier, the more color grains used means that the image is less clear and there is more color distortion.
With direct sunlight, one can work with the lowest ISO settings to ensure the least amount of distortion. Most of my pictures are taken with the ISO setting set to 80 or 100. This is ideal as this is where the least amount of color grains are used, and the image can use as much natural color as possible, which produces the clearest images. One can still achieve really good result with a ISO setting of 200. Anything higher than that though is only recommended for outdoor, night-time shots. If one wanted to take a image of a night party or festival where there is a light-source, light street lights, then a ISO setting of 400 could get very bright images, even when there is a lot of darkness. That's assuming if one wanted to use quick shutter speed though. If one wanted to take a picture of the stars, when one would want to use the lowest ISO setting, as some of the color grains could be mistaken for stars. Also, for those shots, one would want to use a really long shutter speed (30 Seconds recommended) so that the lens could absorb as much natural light from the night-time sky as possible.
Most people who use the automatic setting don't need to worry about the ISO setting used, as the camera will automatically determine the best setting to use in that particular environment. For those who are taking pictures with a custom setting, then there are recommended settings for each particular situation, as described above.
Anyway, on with the pictures!

30 Second Exposure Shot/ISO-80

30 Second Exposure Shot/ISO-200
Notice the
difference with the two images above? Both images used the same exposure
timings, but used different ISO settings. The image that had the ISO
setting set to 200 produced a brighter image than the ISO-80 shot. With
that said, there were also more color grains used in the ISO-200
picture, which resulted in a image that had slightly more color
distortion. However, for exposure shots, both pictures turned out well,
and the better image comes down to personal preference.

30 Second Exposure Shot/ISO-80

30 Second Exposure Shot/ISO-200
Notice the
difference with the two images above. Like with the previous images,
both were taken using the same exposure timings, but with different ISO
settings. These images were taken during sunset, where there is still
natural, ambient light available, along with light sources from outdoor
lighting. As a result, even with plenty of darkness, for a 30 second
exposure shot, the image which had the ISO setting of 200 was to bright,
in comparison with the ISO-80 shot.

Picture showing a slow shutter (1/4 of a second). A ISO-80 setting was used in the image.
In the fountain
picture above, the image had the lowest ISO setting possible for the
camera. The picture was taken at 1/4 second. There was still plenty of
light available for the lens that came from the illuminated fountain in
the lake. This explains why even for a evening shot, one could still use
a low ISO setting with a quicker shutter speed. However, 1/4 second
shots aren't really that quick in the world of photography. The camera
was stationary on a arm-rest when the picture was taken.

How it actually appeared outside. 1/4 second shutter speed using ISO-200.
With a zoomed-out
scenic shot though, there was a lot less light to work with, even with
the same shutter speed. As a result, even with a higher ISO setting
(200) used, the image produced was a lot darker than the fountain image,
which was zoomed onto the light source.

Rain droplets falling from the gutter. Picture was taken at 1/1200 of a second using the ISO-80 setting.
As shown in the
picture above, it appears as if the water droplets themselves are almost
still in appearance because they were captured at a very fast speed.
Because the Sun was out, there was plenty of direct sunlight and as a
result, the lens could still absorb a lot of light at a very quick
speed. Also, because there was direct sunlight, the lowest ISO setting
could be sued, which resulted in a very sharp image which used the
fewest color grains and the maximum amount of natural color possible.

Picture using the ISO-80 setting with a shutter speed 1/280.
I hoped that you
enjoyed getting a quick 101 on shutter speed settings, shutter speeds.
Awesome pictures can be taken when using a fast shutter speed, and
knowing the best circumstances of taking those pictures can result in
some very high quality photos. With that said, enjoy, have a good week,
and take some awesome pictures!

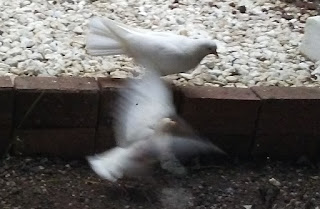
Picture Taken With A Shutter Speed of 1/400 Second Using The ISO-80 Setting.

Picture Taken With A Shutter Speed of 1/550 Second Using The ISO-400 Setting.
There is a huge
difference between these two pictures. It was very cloudy that day. The
camera, in automatic mode, used a high shutter speed with a high ISO
setting to take the pictures. This resulted in a bright image. However,
close-up, there was plenty of color distortion because a lot higher
number of color grains were used to enhance the picture. Using the
custom settings, which were set to ISO-80 and a shutter speed of 1/400
of a second, the picture had a lot less distortion, but came out a lot
darker in the process. In retrospect, I should have used a slower
shutter speed with the same ISO setting since the parrots were more
stationary.
There is a lot of
practice when using custom settings. Different ISO settings with
different shutter speeds can result in really good pictures depending on
the setting and whether flash is used or not. With that said, one can
master the art of using the optimal ISO setting. With that said, I hope
this article provided a lot of information. With that said, it still
recommended to study other guides as well and research this topic in
more detail. The Wikipedia article about ISO settings is linked in the
article. It's a good starting off point in what is a extensive topic.
With that mentioned, go out and take some awesome pictures and be awesome taking them too!
With that mentioned, go out and take some awesome pictures and be awesome taking them too!
Article of Interest
Film Speed - https://en.wikipedia.org/wiki/Film_speed
Amateur Photography - Multi-Second Exposure Shots - https://rkixmiller.dudaone.com/amateur-photography-multi-second-exposure-shots
Amateur Photography - Shutter Speeds (Water) - https://rkixmiller.dudaone.com/copy-of-amateur-photography-shutter-speeds


Comments
Post a Comment